The Art of Charcuterie Styling: Crafting Stunning Grazing Boards
More Than Food: A Visual Centerpiece
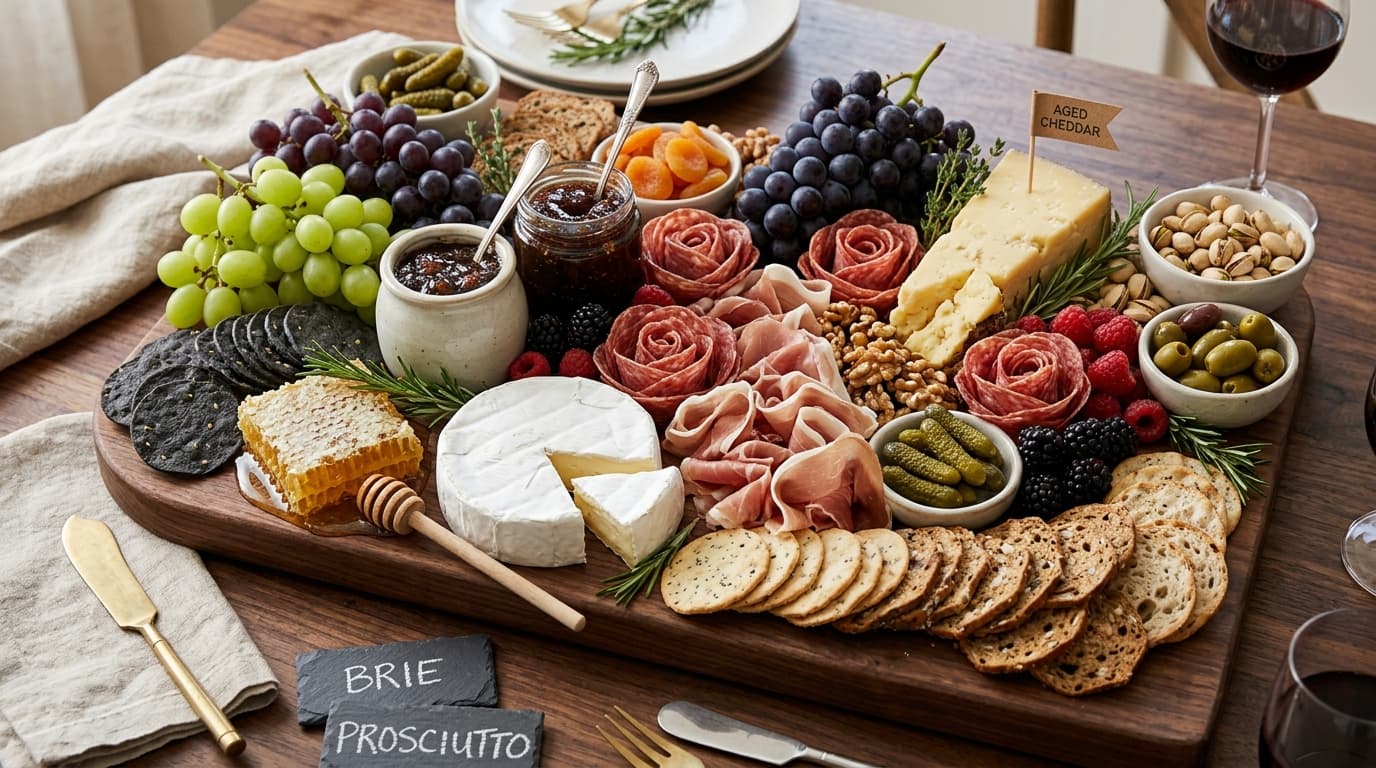
A breathtaking charcuterie and cheese board sets the tone for an entire evening. Styling a professional board is an art of contrast — balancing soft and hard textures, salty and sweet flavors, and organic flowing arrangements.
The 3:3:3:3 Golden Formula
Build balance by choosing 3 distinct cheeses (creamy soft Brie, hard aged Manchego, and tangy blue/goat cheese), 3 cured meats (Prosciutto di Parma, Spanish chorizo, and artisan salami), 3 crunch elements (artisan seeded crackers, toasted marcona almonds, walnuts), and 3 sweet/savory condiments (fig jam, raw honeycomb, cornichons).
Meat Folding: The Salami Rose & Prosciutto Ribbons
Never lay meat flat. Fold prosciutto gently into airy, cascading ribbons to showcase its delicate marbling. For salami, overlap slices around the rim of a wine glass, flip onto the board, and lift the glass to reveal a stunning salami rose.
The 'Anchor First' Layout Rule
Start by placing your condiment ramekins and whole cheese wheels as anchors across the board in a triangular pattern. Build meats outward from these anchors, then flow clusters of purple grapes, blackberries, and crackers into the natural curves.
Filling Negative Space with Color
A luxurious board has zero empty wood visible. Fill every nook and cranny with dried apricots, fresh rosemary sprigs, raspberries, and pistachios for vibrant visual richness.
Professional Chef Secrets & Pro Tips
Elevating your culinary skills from a standard home cook to an instinctual chef requires understanding not just what recipes say, but why ingredients behave the way they do. Professional kitchens operate on efficiency, mise en place, and sensory awareness. Always taste your food at every stage of cooking, adjust seasoning gradually, and pay attention to auditory cues — like the sound of sizzling or the gentle bubbling of a simmer.
- Mise en Place: Chop, measure, and organize all ingredients in small bowls before turning on the heat. This prevents burning and frantic mistakes.
- Salt Management: Salt ingredients in layers rather than solely at the end. Salt draws moisture, enhances sweetness, and penetrates deeply into proteins.
- Temperature Control: Preheat your pans and ovens properly. Adding cold ingredients to a lukewarm pan causes sticking and steamed, soggy food rather than crisp golden browning.
- Acid Balance: When a dish tastes flat despite having enough salt, it usually lacks acid. A splash of lemon juice, sherry vinegar, or white wine instantly brightens heavy flavors.
Common Mistakes to Avoid & Troubleshooting
Even experienced cooks occasionally run into hurdles. Here are the most frequent pitfalls and how to easily remedy them in your own kitchen:
- Overcrowding the Pan: Trapping steam between food items prevents the Maillard reaction. Cook in batches if necessary to keep high heat circulating.
- Rushing the Rest Period: Cutting into roasted meat or baked breads immediately after cooking causes all trapped juices and steam to pour out, resulting in dry texture.
- Using Dull Blades: A dull knife requires excessive force and is significantly more dangerous than a razor-sharp blade that glides effortlessly through ingredients.
- Neglecting Residual Heat: Food continues to cook for 3-5 minutes after leaving the pan. Remove delicate items like eggs or fish just slightly before desired doneness.
Frequently Asked Questions (FAQ)
Q: How do I store leftovers without sacrificing texture? A: Cool food completely to room temperature before covering. Trapped condensation inside warm containers makes crispy skins soggy and accelerates spoilage.
Q: What is the best way to develop an intuitive palate? A: Taste components raw, during cooking, and after resting. Keep a small spice tasting notebook and experiment with one new herb or spice each week.